Tuesday 30th August 2011
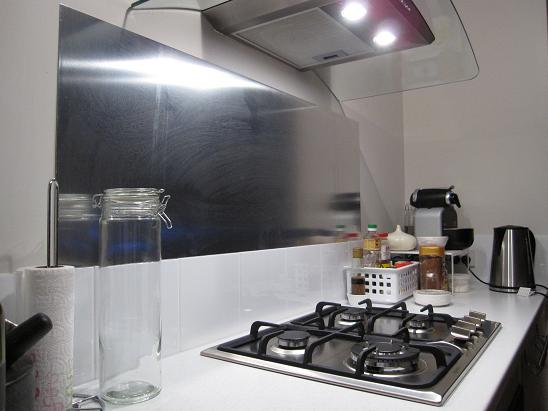
I would ultimately like to have a glass splashback installed in the kitchen but for the time being, a large piece of cardboard box was doing the job. A family friend came over and when he saw the cardboard box, he offered to cut me a sheet of aluminium to use as a splashback. I said 'sure!'. It will not only be a safer option, but it will look more aesthetically pleasing too!
They came over one evening and helped me to adhere it to the wall with some industrial strength double-sided tape.
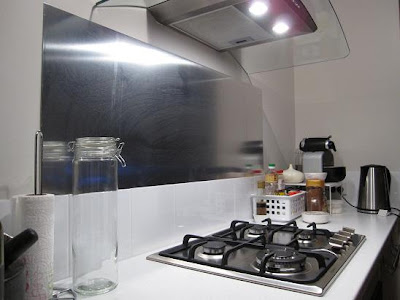
I gotta say...it looks good!
All was well until about 6am in the morning. I woke to a sudden 'CRASH BANG!' and lay in bed, petrified. My first alarming thought was that someone had broken into my house and then I filled with dread as I realised that there was no lock on my bedroom door and that the intruder could come into my room any second. I didn't know whether to leap up and lock myself in the bathroom or to pretend to still be asleep and hope that the intruder would leave. After some agonising seconds, I didn't hear any retreating footsteps of anyone making a getaway, so I cautiously got out of bed and swung my bedroom door open.
I stepped out and saw immediately what had caused the noise. The metal splashback had eventually been too heavy for the double-sided tape to hold up and it had slid off the wall and onto the floor, taking a glass spaghetti jar with it.
At least that explained the noise!
But now I have some scratches in the vinyl floor where the sharp corners of the splashback had gouged it out. *sniff* It's not really that bad and you can't see the cuts in the vinyl unless you go looking for them. But I know they're there.
Sunday 9th October 2011

My Dad and cousins have been helping me install my air conditioner units for the past few weeks. Although they've been really busy, I really appreciate them taking the time to do it because I do not want to spend the summer without them!
Wednesday 17th August 2011
Today I was finally able to take the day off work and Long came over to help me complete the driveway paving. Long story short, the builders left a gap about 30cm from the end of the pavers to the concrete verge. My dad went out and bought more pavers for me and they've been sitting around waiting for me to get to it.

So, firstly we began by chiseling away the concrete that the builders had set around the pavers to keep them in place.


My neighbour lent me his diamond head cutter thing and Long got to work trimming about one centimetre off one of the edges of the pavers to make them fit.
After a few pavers, we realised that the amount of paver we had to trim off was going to be different as the pavers had been laid at a very slight angle to the verge. It was a matter of millimetres!

So, we had to place the pavers along the length of the driveway and individually mark out how much needed to be trimmed.


This worked really well.

Almost done!

Once all the pavers were in place, we went along and smacked them down with the rubber mallet to make sure they were all level.


Now all we needed to do was mix up a few bags of cement and pack this down at the sides of the driveway to hold the pavers in position. It'll be a few days before I will drive the car up onto it just to give the concrete plenty of time to set properly.

Voila! In no time at all, we had the driveway finished! Ok, it reality it took about two hours but I thought it would take longer.
I made lunch for us and we ate them while sitting in the garage, admiring our hard work, much to the amusement of some of my neighbours who drove past and saw us.

After a few days, I finally mounted the kerb, slowly eased up the driveway and into my garage for the first time. My car finally has a home!
Sunday 19th June 2011
Today my friends came over and we began the epic task of transporting my aquarium from my parents' place to my house.
We had to bag the fish up (poor things!), siphon most of the water out and scoop out as much gravel as we could to make the glass tank as light as we could for moving. Benoit borrowed his brother's car and we managed to fit the tank and the desk that it sits on in the back. Phew!
I also packed up my car, put my TV into Kong's car and drove to the house, where we had to set up the aquarium.
With such a big water change and having the fish in the bags for over an hour, I was worried that some might not survive the move, but they have all made it except for one baby guppy.

I can't wait to restock the tank with some plants and new fish. I've been holding off on making any new additions to the tank before the move...but nothing's gonna stop me now...
15 June 2011
I like to look around and do my homework when it comes to purchasing things for the house. Especially when it comes to something that's supposed to be a long term investment like a fridge or washing machine.
I have grown up with a top loader washing machine and have never used a front end loader. However, I have heard that front end loaders are more energy efficient and therefore are most cost effective to run and own. However, the cycles are generally longer on front end loaders but you can get some models that have a 'quick' cycle. They're also much more gentler on your clothes apparently.
So, with these points in mind, I started researching online to find out which model was better for me. Once I settled on the front end loader, I started comparing different models. It helped that David has a subscription to the Choice Review website so you can get very comprehensive reviews and comparison guides on there.
I quickly decided on the model I wanted and then it was a matter of hitting the stores to try to get a good price.

The Electrolux EWF1074 7.5kg Time Manager model.
I price-matched my way from over $900 down to only $600!
Dad helped me install it and tonight I took it for a test drive. I was careful to watch for any water leakages but all seemed well.

The clothes are spun really well so that when I hang the clothes on the air dryer, I don't have water dripping onto the floor, which is great since I'm drying the clothes indoors since I don't yet have an outdoors clothes line.
Sunday 15th June 2011

I had some unexpected helping hands to help me finish off most of the painting on Sunday. Thanks so much guys!
I have always wanted to create a little corner of the house with a vintage/shabby chic theme. I decided that I would dedicate the entrance of the house to this project.
I was a bit anxious when it came to choosing the colour of the paint for the wall. It needed to be a greenish blue. I did worry that the colour I chose would not turn out right or would just look awful. However, as I was painting the colour onto the wall, I squealed in delight. It looked gorgeous!

Wall - Dulux Wash & Wear low sheen - Mainstream
Console - from Corner Store on Stirling Highway.
I need to find an antique mirror (or one that I can revamp to look antique) to hang above the console and perhaps a coat stand or some hooks in the wall for hanging coats.
It's looking very pretty indeed!
Friday 10th June 2011

To try to make my colour selection for the ensuite, I narrowed down my choices and stood them up against the wall. I stepped back and tried to envision the room with each particular colour. It is going to be such a difficult decision because the colours are so similar, yet oh so different!

I orginally decided to go with Dulux's 'Sago Half' but when I looked at it the next day, I realised it's got a tint of pink in it.
I have settled on 'Beige Royal Quarter'. It's more of a brown hue so it will look much more neutral rather than cream/pink.
Friday 3rd June 2011

The concrete has dried up and I am loving the colour. I chose 'Paperbark'.
Saturday 28th May 2011
One of the things I want to get done around the house before I move in is paving. It would help to cover up the sand and dirt before I start moving things into the house or I'm going to have to spend alot of time dusting and vacuuming.
Firstly, I ruled out brick pavers because I don't like the idea of all those individual bricks/pavers laid out in a criss cross pattern. You get ants building their nests inbetween them, weeds and grass are able to grow between them, and the pavers can move/sag over time.
Now, to figure out what I do want.

My first choice was exposed aggregate, which is basically concrete that is combined with an aggregate material, such as pea gravel, and the top layer of concrete is washed away to expose the aggregate. I've seen some examples of exposed aggregate concrete and I love the look of it. But alas, the pricing I got starts at about $80 per square metre and is therefore out of my budget for the area I want to cover.

Next choice was liquid limestone, which is similar to concrete except that it is made from crushed limestone. The price was about $55-$60 per square metre but the tradesmen who came out to do quotes for me suggested that I opt for concrete instead.
Why?
The general consensus between them and from my own research was:
1. A limestone surface will not heat up as much as a concrete surface.
This is why limestone is so popular for use around a pool or where people will be walking around barefoot. I have to admit, I usually walk around the backyard barefoot because I'm either too lazy to find my shoes or I like the feel of the warm bricks beneath my feet.
2. Limestone is very porous so you need to apply a layer of sealer after installation and every one or two years from thereon. This will protect it from spills and stains.
You can do this yourself by purchasing the sealer from a hardware store and rolling it on like you would with paint. You can seal concrete too if you want. This will give it a deeper/darker colour than if it were unsealed. I've also read that it would be easier to clean (ie oil stains).
3. Limestone is a natural colour whereas with concrete I can choose from a large range of colours that they mix into the concrete.
Being a natural product, the colour of the limestone will vary and I didn't want my paving to look too light or on the grey side. With concrete I can choose a colour that will suit the house. I think you can add colour to liquid limestone too but then you may as well get concrete.
4. Concrete is cheaper than limestone.
There isn't much difference between the price of concrete and liquid limestone, but when you factor in having to seal the liquid limestone and the area that you want to cover, it can lead to a large difference in your final calculation.
So, after weighing these factors, I decided to go with concrete.
I have narrowed down my choice of colours to the three below. It's hard to say what it will look like in real life.