Tuesday 30th August 2011
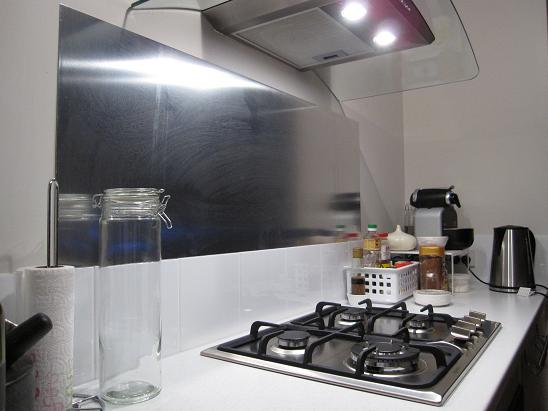
I would ultimately like to have a glass splashback installed in the kitchen but for the time being, a large piece of cardboard box was doing the job. A family friend came over and when he saw the cardboard box, he offered to cut me a sheet of aluminium to use as a splashback. I said 'sure!'. It will not only be a safer option, but it will look more aesthetically pleasing too!
They came over one evening and helped me to adhere it to the wall with some industrial strength double-sided tape.
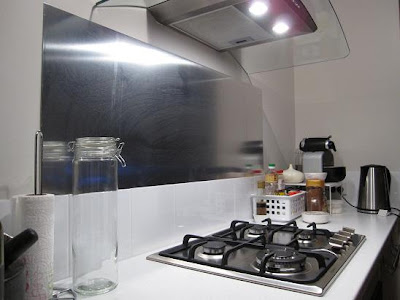
I gotta say...it looks good!
All was well until about 6am in the morning. I woke to a sudden 'CRASH BANG!' and lay in bed, petrified. My first alarming thought was that someone had broken into my house and then I filled with dread as I realised that there was no lock on my bedroom door and that the intruder could come into my room any second. I didn't know whether to leap up and lock myself in the bathroom or to pretend to still be asleep and hope that the intruder would leave. After some agonising seconds, I didn't hear any retreating footsteps of anyone making a getaway, so I cautiously got out of bed and swung my bedroom door open.
I stepped out and saw immediately what had caused the noise. The metal splashback had eventually been too heavy for the double-sided tape to hold up and it had slid off the wall and onto the floor, taking a glass spaghetti jar with it.
At least that explained the noise!
But now I have some scratches in the vinyl floor where the sharp corners of the splashback had gouged it out. *sniff* It's not really that bad and you can't see the cuts in the vinyl unless you go looking for them. But I know they're there.
Sunday 9th October 2011

My Dad and cousins have been helping me install my air conditioner units for the past few weeks. Although they've been really busy, I really appreciate them taking the time to do it because I do not want to spend the summer without them!
Wednesday 17th August 2011
Today I was finally able to take the day off work and Long came over to help me complete the driveway paving. Long story short, the builders left a gap about 30cm from the end of the pavers to the concrete verge. My dad went out and bought more pavers for me and they've been sitting around waiting for me to get to it.

So, firstly we began by chiseling away the concrete that the builders had set around the pavers to keep them in place.


My neighbour lent me his diamond head cutter thing and Long got to work trimming about one centimetre off one of the edges of the pavers to make them fit.
After a few pavers, we realised that the amount of paver we had to trim off was going to be different as the pavers had been laid at a very slight angle to the verge. It was a matter of millimetres!

So, we had to place the pavers along the length of the driveway and individually mark out how much needed to be trimmed.


This worked really well.

Almost done!

Once all the pavers were in place, we went along and smacked them down with the rubber mallet to make sure they were all level.


Now all we needed to do was mix up a few bags of cement and pack this down at the sides of the driveway to hold the pavers in position. It'll be a few days before I will drive the car up onto it just to give the concrete plenty of time to set properly.

Voila! In no time at all, we had the driveway finished! Ok, it reality it took about two hours but I thought it would take longer.
I made lunch for us and we ate them while sitting in the garage, admiring our hard work, much to the amusement of some of my neighbours who drove past and saw us.

After a few days, I finally mounted the kerb, slowly eased up the driveway and into my garage for the first time. My car finally has a home!
Sunday 19th June 2011
Today my friends came over and we began the epic task of transporting my aquarium from my parents' place to my house.
We had to bag the fish up (poor things!), siphon most of the water out and scoop out as much gravel as we could to make the glass tank as light as we could for moving. Benoit borrowed his brother's car and we managed to fit the tank and the desk that it sits on in the back. Phew!
I also packed up my car, put my TV into Kong's car and drove to the house, where we had to set up the aquarium.
With such a big water change and having the fish in the bags for over an hour, I was worried that some might not survive the move, but they have all made it except for one baby guppy.

I can't wait to restock the tank with some plants and new fish. I've been holding off on making any new additions to the tank before the move...but nothing's gonna stop me now...